I finally completed my markups! Building a Cozy requires several hours of reviewing modifications and corrections to the plans. Cozy Mark IV plans were modified from Cozy 3 plans, which were modified from Long-EZ plans, which were modified from Vari-EZ. Changes are required for certain dimensions, fasteners, and modifications to the design based on builder's experiences. Marking up the plans is like eating your vegetables; you don't necessarily enjoy it, but you know you have to do it.
I thought I had marked up my plans years before, but it was obvious when I reviewed them again that I had not finished the job. Now back to building!

Showing posts with label .Prebuild. Show all posts
Showing posts with label .Prebuild. Show all posts
Wednesday, August 3, 2011
Tuesday, June 14, 2011
Practice Kit

 Note on the confidence piece: Can you lay it on a broomstick and stand on it? you bet. Can you bounce up and down on it? uh, no.
Monday, May 16, 2011
Plans
I started going cross eyed after reading Chapter 3 in the plans - the content seemed random, jumping back and forth from topic to topic. I felt like I was reading about the same subject over and over, in several different places in the plans. I finally decided to cut and paste the content into an MS Word document with organized sections I could understand. I used the Aerocanard .pdf plans that Jeff Russell had posted online a few years back (relax, I paid Nat for his plans, too!) and augmented them with notes and edits of my own, as well as inputs from the canard forums and FAQs. Although this may seem like a big waste of time, it has helped me a lot in understanding what had to be done, and left me with a reference where I could easily jump to whatever subject I wanted, without having to hunt for an obscure paragraph in the middle of the original plans.
Sunday, May 15, 2011
Tools
This is one area where you can go bare bones or hog wild, depending on your desires and your budget. Since I want a lot of cool toys (uh, I mean tools), but I'm cheap, I struggled for awhile on which way to go. For some tools I started cheap, with the promise to myself that I would upgrade as work on the plane progressed. Time will tell.
 Cutting tools:


 After doing some research, I decided to model my scale setup on what Charles Furnweger had built, combining it with the epoxy hot box with a light bulb to heat the epoxy. I didn't want to spend a lot of time building the custom thermal control electronics Charles had used, though, so I did a little bit of surfing on Youtube and saw a lot of guys using a "lower thermostat" from a hot water heater to control the temperature in incubators they were building to hatch chicken eggs. I found the thermostats at the hardware store for a few bucks. I noticed in the videos that a lot of the incubators were cycling on and off quite a bit, though, and decided to use a dimmer switch to keep the light bulb just bright enough to maintain the correct temperature. I used some of the leftover 3/8" plywood from my hurricance plywood stash, which in hindsight wasn't the best choice. I wasn't too careful when drawing up the dimensions, so there was a lot of trial-and-error cutting before I finished. I used household insulating foam with a foil backing inside. I'm not too proud of the craftsmanship on this one, but it works (I think). Here are a few pictures:
 After all the foam cutting I did while building the hot box, I realized I was going to have to get serious about dust management. Tracking foam dust into the house did not make the boss happy at all. I found some paper booties I had bought years back and use them every time I'm cutting foam now. I found that the leaf blower works much faster than a vacuum or broom in clearing most of the dust away. I'm going to have to borrow the household hand vac as well - hauling out the shop vac is just too much hassle for small jobs.

I had a pair a fairly heavy duty scissors that I was planning to use, but started getting excited about other options, including the electric dritz scissors. Other Cozy builders were using the rotary "pizza cutter" type tool. I had tried an actual pizza cutter with little success, but my daughter mentioned that she had sliced her finger using her rotary cutter while sewing and didn't want it any more, so I borrowed it from her. Works great.
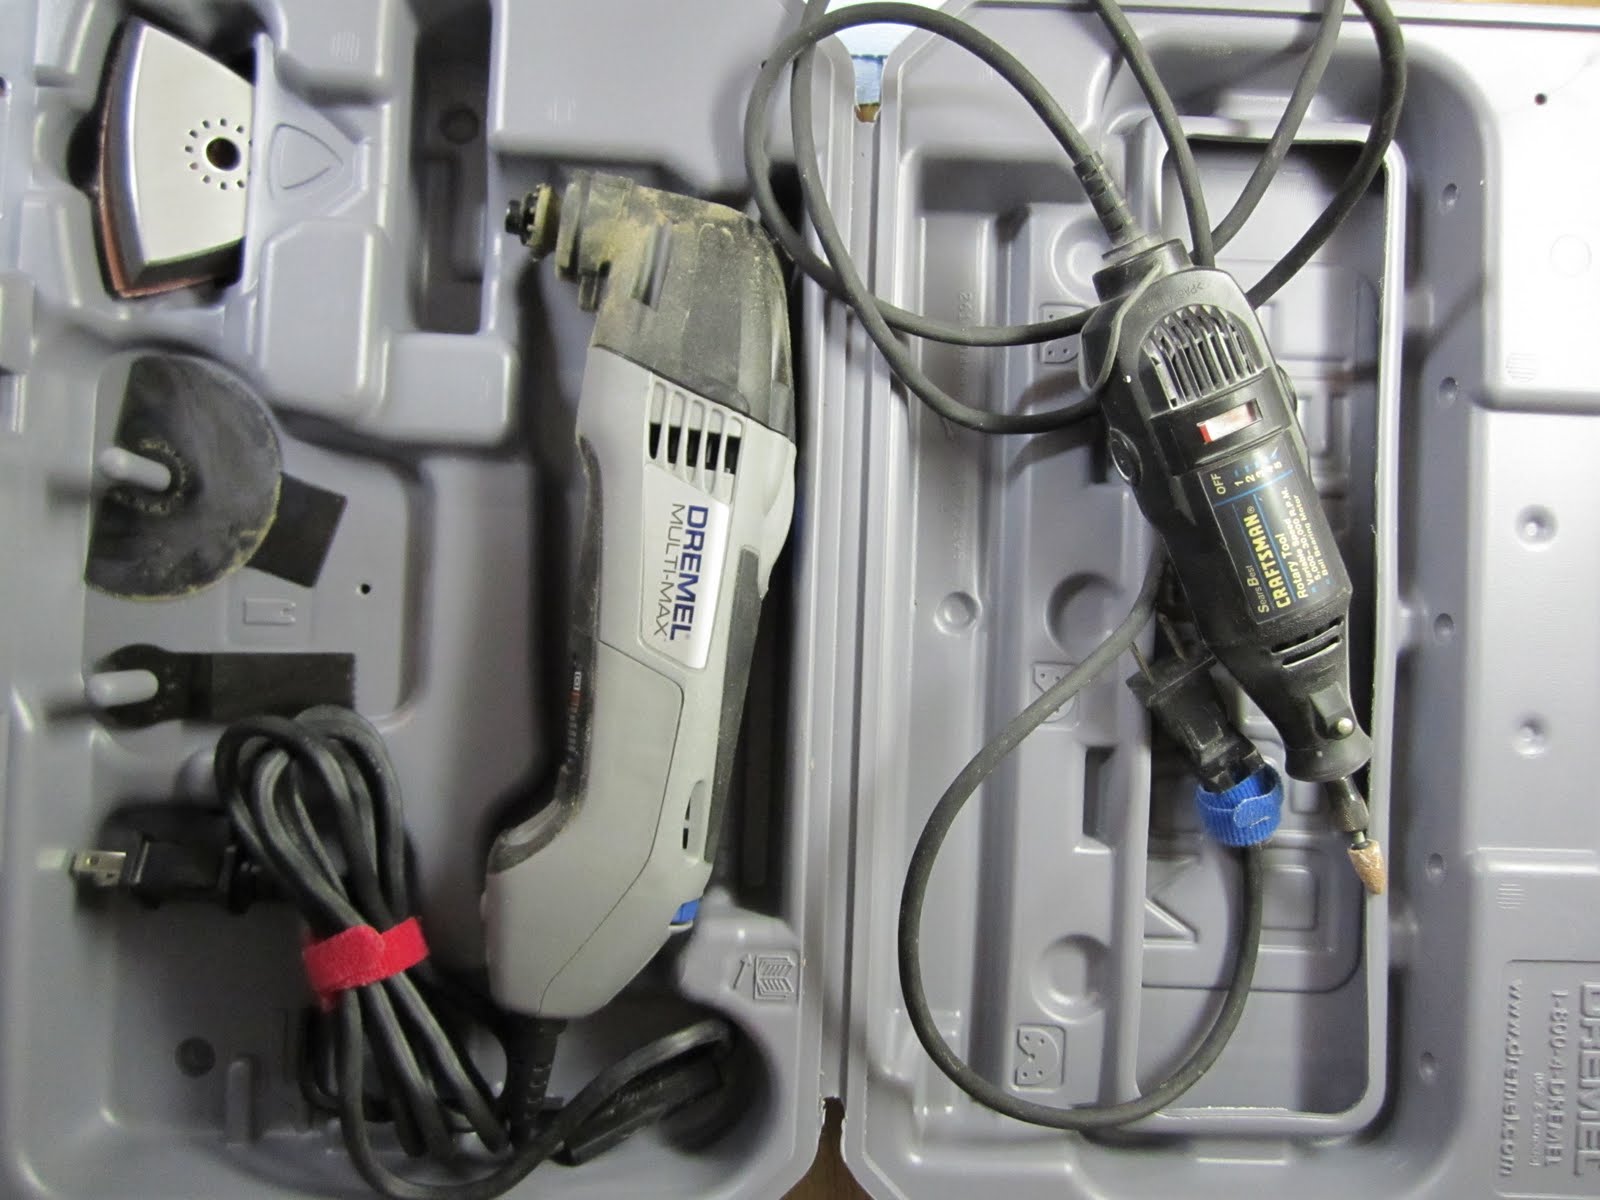
I already had a Dremel rotary tool and bought a Dremel oscillating tool (Fein knockoff, but seems to work just fine, and had good reviews online).

I bought a Smart Level years ago when I first started building and used it to level the workbench. A great tool, but kinda pricey, so in hindsight I might have waited until I actually needed it for leveling the fuselage.

I waffled between buying an epoxy pump or going cheap on the scales for awhile. Did I mention I was cheap? I figured I'd start with a scale and see how well it worked for me. I had built the Rutan scale years back, but it was set up for Aeropoxy, and I had decided to try MGS for awhile, and the lever arm wasn't long enough for MGS. I was also a little uneasy about the accuracy of the Rutan scale, even though I'm sure dozens of canards were built using it with no problem.

 After doing some research, I decided to model my scale setup on what Charles Furnweger had built, combining it with the epoxy hot box with a light bulb to heat the epoxy. I didn't want to spend a lot of time building the custom thermal control electronics Charles had used, though, so I did a little bit of surfing on Youtube and saw a lot of guys using a "lower thermostat" from a hot water heater to control the temperature in incubators they were building to hatch chicken eggs. I found the thermostats at the hardware store for a few bucks. I noticed in the videos that a lot of the incubators were cycling on and off quite a bit, though, and decided to use a dimmer switch to keep the light bulb just bright enough to maintain the correct temperature. I used some of the leftover 3/8" plywood from my hurricance plywood stash, which in hindsight wasn't the best choice. I wasn't too careful when drawing up the dimensions, so there was a lot of trial-and-error cutting before I finished. I used household insulating foam with a foil backing inside. I'm not too proud of the craftsmanship on this one, but it works (I think). Here are a few pictures:
 After all the foam cutting I did while building the hot box, I realized I was going to have to get serious about dust management. Tracking foam dust into the house did not make the boss happy at all. I found some paper booties I had bought years back and use them every time I'm cutting foam now. I found that the leaf blower works much faster than a vacuum or broom in clearing most of the dust away. I'm going to have to borrow the household hand vac as well - hauling out the shop vac is just too much hassle for small jobs.
Monday, March 7, 2011
Workshop

Before the sheetrock went up, I installed a couple additional power outlets along the walls. I also added a retractable extension cord to the ceiling power outlet. This makes it easy to get power when I need it, wherever I am in the workshop.
I cut a hole in the back wall and installed a small AC unit that I picked up at Sears. The unit I got was way too small for the size of room it needs to cool - I'm hoping that with all the insulation installed, it will at least be tolerable in the summer. The sheetrock was then put up.
The garage was pretty dim inside when I started. The sheetrock really helped to brighten up the interior, expecially after I painted it a glossy white. I also painted the floor with a light shade of gray epoxy to maximize the light. The single incandescent bulb in the middle of the room was replaced with a circular flourescent bulb and augmented with four flourescent shop lights.
I also noticed that dirt was also drifting in from the roof vent, as well as chips from the waferboard roof panels. After having to manhandle the heavy sheetrock around to get it installed on the walls, I didn't want to have to install sheetrook on the ceiling as well. Idecided that foil backed styrofoam panels would work fine to cover the ceiling. I only got a few installed before I got distracted and the work stalled.
I did get the bench built - it's a monster at 4 feet by 12 feet. It was a little wobbly at first, but after I closed the bottom of the bench top to make it a box, it was rock steady. I have no idea how I'm going to move it when I need to - it weighs a ton.
After I decided to start building again, it took me several weeks to get the garage cleaned up enough to start work. All sorts of tools and hardware were scattered all over the place, and there was way too much unneeded junk. After making a few trips to Goodwill and moving some stuff up to the attic, I finally had enough room to work. I still have to figure out where to put all he playwood panels that I made to cover the windows for Hurricane Ike.
I built a rolling cloth cabinet since I didn't have much in the way of wall space. I probably made it too big as well, but I wanted to maximize the surface for cutting. After having it roll away from me when I tried to drop the door, I replaced two of the free rolling casters with locking ones. It stays put when I want it to now.
I added more styrofoam panels to the ceiling until I got most of it covered. I had to leave some holes for my ladder and a few other things, but it should still help quite a bit to keep the room cool. I taped aluminized bubble wrap the the garage door panels to help as well.
Subscribe to:
Posts (Atom)