I wasn't crazy about the sharp internal corners and tried to round them out a bit, but ended up drilling too far into the corner. Most of the others were 1/8' to 1/4" too short around the edges.

Showing posts with label Chapter 4 - Bulkheads. Show all posts
Saturday, May 19, 2012
Cutting out the hard points
Well, they're cut out, but none of them to the proper size. Dang it!
I wasn't crazy about the sharp internal corners and tried to round them out a bit, but ended up drilling too far into the corner. Most of the others were 1/8' to 1/4" too short around the edges.

I wasn't crazy about the sharp internal corners and tried to round them out a bit, but ended up drilling too far into the corner. Most of the others were 1/8' to 1/4" too short around the edges.
Labels:
Chapter 4 - Bulkheads
Wednesday, April 18, 2012
Hardpoint Layup Part II
I bought a new wood/metal blade for the Multimax to replace the wood/drywall blade I had been using before, since the old blade was staerting to wear down. I gave it a test cut and saw that the sliver that I cut off the LG bulkhead hardpoint layup was still pretty flexible, even though the whole piece seems ridgid. Not sure what this means yet (if anything).
Since the layup was just shy of the thickness I needed, I decided to just add a couple more layers to get to the right thickness. With just two plies, the layup went pretty fast, but I noticed some darkening of the layup while I was working. After the layup was cured and I had pulled the plastic and peel ply up, I discovered the culprit. I had thought that I had a layer of plastic under the layup, when I actually still has the paper template underneath. The wet epoxy had wicked into the paper, leaving several fairly large areas with the paper imbedded in the cured epoxy.
I first tried using the chisel to prt the paper loose, then switched to sandpaper, and then to the Multimaz flexible scraper. The scraper seemed to be doing a good job of removing the paper, but it also removed the roughness of the layup from the peel ply.
I went out and bought a new rigid scraper blade and abrasion attachment. I went straight to garage to try out the new scraper. It seemed to be peeling up the paper okay, but I couldn't tell if I was digging into the core layup as well, so I switched to 50 grit sandpaper on a palm sander. The sandpaper seemed to be giving it a smooth finish, which I didn't want, so I switched to the abrasion attachment. This gave a much rougher finish, but I started to see tufts of glass and quickly backed off. I decided to stop until I could figure out what grit I should be using.
It wasn't till I took a break that I noticed that I has gotten fiberglass dust everywhere, including myself. I hadn't even put a shop apron on, so the painful fiberglass itching started as soon as I got back into rhe house.
After another trip to the hardware store, I came home with a Tyvek painter's jumpsuit and some 40 grit sandpaper. It's amazing how hard 36-grit is to find theae days. I got a much rougher surface with the 40 grit, so I was then ready for cutting out each hardpoint.
I squared up some of the edges first and started cutting. I expected that I would have to switch to a jig saw for some of the cutting, but I was able to use the Multimax and then follow up with some sanding. I wasn't really keen on the sharp inside corner of the hardpoint, so I rounded it out by drilling a hole there and then cutting straight lines to the hole. I thought I was done with that piece, but I wanted to match it up to the bulkhead just to be sure. I saw a few areas where things didn't line up too well. I sanded some of the edges down till I got them too match. I was afraid I might end up sanding the piece until it was too small to use but I think it turned out ok.
Labels:
Chapter 4 - Bulkheads
Monday, April 9, 2012
Hardpoint Layup Part I
This weekend I decided to do some work on the LG bulkhead hardpoint layup. I cut 5 more plies to get to the total of 22 plies needed for the layup. I laid out the paper template, the plastic and the peel ply prior to the first layup. I had used masking tape to hold the edges when cutting each ply, so I was confused when I started having a hard time getting the fibers lined up with the paper template. The second ply was even worse. I stood there scratching my head (figuratively - you don't want epoxy covered gloves anywhere near your hair) before I realized that I had cut the last 5 plies to 8" by 12", the exact dimensions required for the finished layup. I knew it was going to be almost impossible to get the edges to line up correctly with the undersized pieces, so I switched to using the bigger plies that Steve and I had cut earlier (with a 2" margin on each side). They were a LOT easier to keep the weave lined up on.
A lot of builders ended up with layups that were too thick on their first try, and I wanted to make sure that didn't happen with mine. I made sure I used the hair dryer with each ply I laid up, and let each ply pull up epoxy from the ply below.
I started to see a ridge running down the layup, and noticed that it was directly over a crease on the 4 mil plastic I had laid the layup over. I couldn't believe that a small crease like that would show up all the way through heavier plastic I had used over it, as well as through the peel ply and several layers of heavy wet fiberglass. I cleared off another section of the work table and moved the layup over to it to get away from the crease.
I was baffled by some funky looking round spots that kept showing up on the workpiece before I realized that they were simply where I had pressed my fingertips into the glass doing the layup.

When I finished laying the oversize plies, I decided to trash the undersized plies I had made and cut and laid up new oversize ones. I laid peel ply and plastic over the top, then laid a square across two 1/4" plates to check for thickness. I was surprised to see that the layup was bit too thin instead of too thick. I added the another oversized ply and checked again. It still looked too thin, but I saw that the square was resting on the tape around the edges of the layup (I didn't scissor trim the plies) and figured that I was probably the cause.
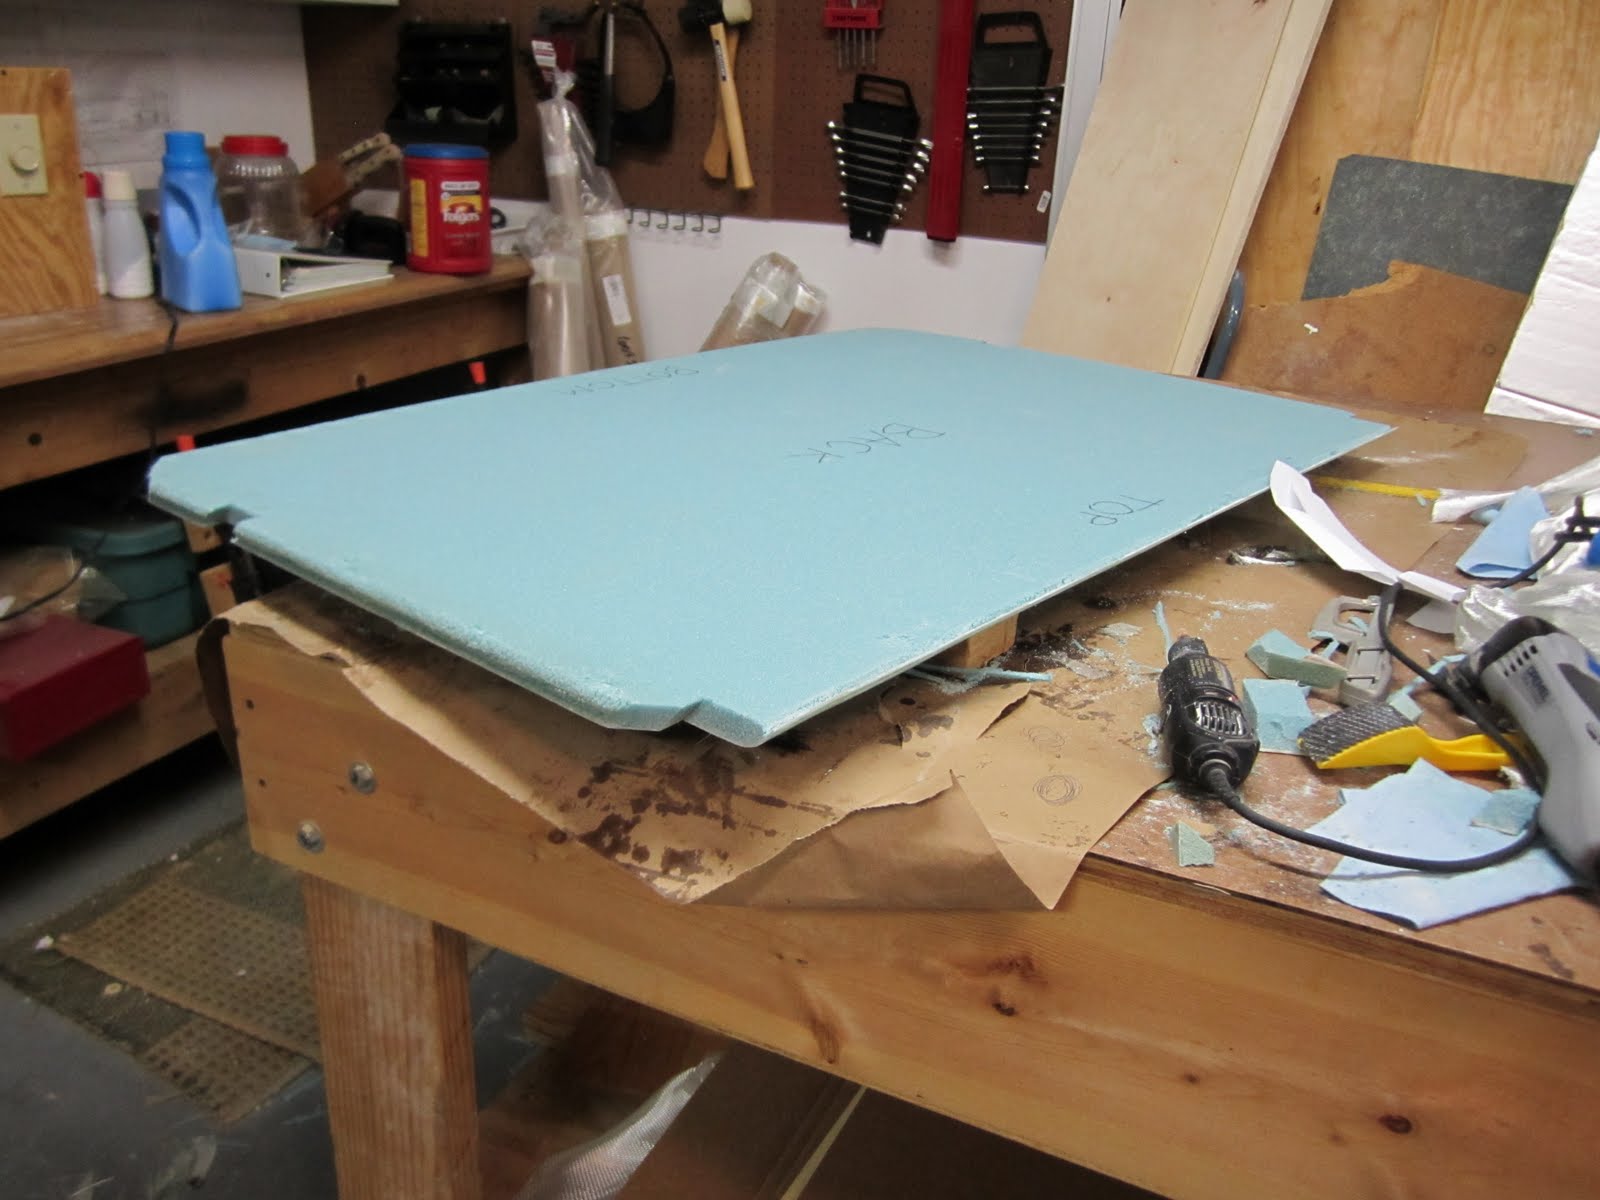
When I cut the edges off the layup the next morning, though, I found that it was just shy of 1/4" thick.
A lot of builders ended up with layups that were too thick on their first try, and I wanted to make sure that didn't happen with mine. I made sure I used the hair dryer with each ply I laid up, and let each ply pull up epoxy from the ply below.
When I cut the edges off the layup the next morning, though, I found that it was just shy of 1/4" thick.
Labels:
Chapter 4 - Bulkheads
Monday, April 2, 2012
Fun with the F-28 Bulkhead
Back to building again - Yay!
I figured my shoulder was well enough to start building again, so I called up Steve Robbins and took him up on his earlier offer to come inspect the workshop and maybe do a layup or two.
Steve arrived early Saturday morning and took a look at my garage/airplane factory. Aside from a few suggestions, he was happy with layout and outfitting of the shop, and suggested we do a layup while he was there. I decided on doing the F-28 bulkhead, since it was a fairly small piece.
I figured that cutting the glass for the layup was going to take about five minutes, but Steve was VERY careful about making sure the weave was straight with each piece before cutting it, and with taping the edges to make sure the cloth didn't shift after we cut it. This seemed a little over the top at first , but paid off later when laying the glass.
I started pumping the epoxy into the cup and was a little nervous when the hardener came out with a brown color, rather than looking clear like I had expected. We proceeded anyway, and I made a note to myself to check the forums to see if this was going to be a problem. I had planned to use only slow hardener for all my future layups, but since I had some fast hardener from my first epoxy order, I used a little bit of that in the mix as well for this layup. Steve suggested forgoing the first pass with with the micro, since the Clark foam was so dense there really wasn't much weight savings. I agreed, so we proceeded straight to the first layer of BID. Steve brought a 2" paintbrush to stipple with, and I found it was easier to spread the epoxy with a brush than with a squeegee, especially for a part that small. The hardest part was making sure the weave was straight. Even for a small piece that was still taped at the edges, it was tough getting the fibers to line up right until the epoxy started to set in. The second layer of BID and final one of UNI seemed to go on a little easier. Using the hair dryer helped keep the epoxy runny enough to work with, but Steve was a little surprised at how fast the epoxy seemed to be curing. We ended with the layer of peel ply tape on top, scissor trimmed it, and called that one done for the day.
We next moved on the cutting the 22 layers of BID for the landing gear hardpoints. After a few false starts (it's amazing how something so simple as figuring out the weave angle can get so confusing), we got into a nice rhythm. We used up the first roll of BID pretty quickly since I had bought smaller rolls of BID rather than one big roll. Steve was recovering from a cold and was starting to look a little worn out by this time, so when we used up the second roll, I took pity on him and told him I could finish the last few plies myself so he could go home and rest.
I came back to the garage that evening and tore the the peel ply from the layup. The finish ended up looking pretty nice, although I saw a lot of specks from the air bubbles that had formed under the layup. Some epoxy had gotten underneath the workpiece, so after staring at the underside for awhile wondering what to do, I just hit it with the Multimax sander to remove the dried epoxy (or at least rough it up enough to do a layup over it). I started trimming and was surprised at how hard it was to get around the inside corners with the Multimax half circle blade. I ended up using the sanding attachment to get the final trimming complete.
I came back out to the workshop Sunday evening to finish the other side. Since the epoxy had set a little fast the day before, I only gave the epoxy a tiny squirt of fast hardener and used slow hardener for the rest of the mixture. I went ahead and tried to micro this side of the bulkhead and ended up taking all the micro off the surface with the squeegee, so Steve was right about that. (But you know I HAD to test it myself). Getting the fibers to line up right on the first layup was frustrating to say the least - I'll have to work on laying it down more carefully. I was surprised when the epoxy started feeling thicker when I got to the UNI ply. I had forgotten to plug in the hair dryer and got it all sticky trying to get it set up. By the time I laid down the peel ply, it was already starting to gel. I quickly mixed a new batch of epoxy and poured it over the peel ply, but I left the gelled epoxy alone, since I didn't want to disturb the layup underneath. I was really confused at how fast the epoxy had cured, especially since I was using mostly slow hardener.
Or was I?
I opened up the epoxy box, noted the location and numbers on the cans of hardener, and double checked them against my MGS data sheet. Sure enough - I had gotten the two hardeners mixed up and was using mostly fast hardener for the layup. Doh! I grabbed a Sharpie and marked the two types of hardener on the hot box so this wouldn't happen again.
When I inspected the layup the next morning, it looked awful. When I tried to pull the peel ply off, most of it stayed on the workpiece. I spent the next evening sanding down the epoxy clumps and then chiseling the peel ply off. I ended up with a pretty crappy finish. Oh well.
Labels:
Chapter 4 - Bulkheads
Saturday, December 10, 2011
Hiatus due to surgery recovery
Project on hold as of November 1st due to rotator cuff surgery. Hoping to be able to start up again by February 2012.
Labels:
Chapter 4 - Bulkheads
Thursday, August 25, 2011
Firewall Bulkhead
I decided to hold off on glassing the bulkheads until I was able to type up more detailed steps for doing it. I was finding way too many things in the plans that I might miss if I didn't have them written out step by step. In the meantime, though, I decided I could move ahead and cut out the firewall pieces.
I tried to pin the firewall templates to the plywood sheet, but the birch plywood was too dense for that, so I taped it down instead. I then tried drawing a line around the edge of the template with a pencil, but keeping the line on the very edge of the template got very tedious very quickly. I went ahead and cut the firewall out with the template still attached. I made my first cut an inch or so from the edge to see how the jigsaw I was using would handle the thin, dense plywood. When I saw how much the wood blade was tearing up the veneer, I stopped and switched to a metal blade, but it didn't seem to want to change direction too well. I switched back to the wood blade and used it to rough cut the firewall shapes, leaving an inch or so around the edges. I decided it was time to buy myself some new jigsaw blades and use those for the final cut, so I called it a night.
I came back the next evening with a new set of blades made specifically for plywood and got to work making the final cuts on the upper and lower firewall pieces. I found that my hands weren't as steady as my eyes wanted the lines to be. After awhile I moved to cutting out the shapes about 1/8" from the edge, then came back again for the final cut. The straight edges were more difficult than the curves. I clamped a straight edge along one side and tried to use it for a guide, but the jigsaw still wanted to wander off on its own. When I made cuts near an edge, the blade would start to bend away from the cut, giving me a beveled edge that I obviously didn't want. I ended up spending a lot of time using my wood rasp and sanding blocks to finish the edges and get them reasonably straight and square.
The next night I cut out the two side pieces. These pieces were smaller and all straight cuts. I scored along the cuts this time before cutting them with the jigsaw to give me straight edges to work from and to keep the wood from splitting. I used the jig saw again because I didn't want to have to haul out the table saw only to find that it was shredding the wood with its blade. The jigsaw has a laser that marks out a straight line for you to follow, but I found I couldn't see the blade clearly when I used it, it so I ended up turning it off. The cuts were a little better than before, but I still had to spend some quality time with the wood rasp and sanding blocks to get straight clean lines.

I waffled over the engine mounts; several builders were uncomfortable with how close the bolts were to the edge when installing the engine mount and suggested making the mounts 2" square rather than the 1" called out in the plans. The blank that I ordered was 2" by 4", so it would have been easy enough to do, I guess, but I decided to stay with the 1".
I also asked around the forum on securing the screws to the firewall, since there seems to be a strong consensus that the plans method leaves a lot to be desired. I liked the idea of using pieces of welding rod that fit into a slot cut into the firewall, but I don't have any idea how to weld them to the screws, and I'm not keen on having to learn welding for such a simple task.
A week after building the engine mounts, I had the day off, so I decided to go see what more I could do on the bulkheads. I had never really studied what all the holes in the firewall were for, so I spent some quality time with the plans trying to figure it out. Hmm... seems there are FOUR engine mounts required, not just the two I has built earlier - doh!
Labels:
Chapter 4 - Bulkheads
Sunday, August 21, 2011
Cutting out aft bulkheads
The aft bulkheads are medium density PVC and are a lot lighter than the last-a-foam used for the F22, F-28 and IP bulkheads. It was pretty easy to cut them out with one or two passes of a razor knife They were a lot less stiff than the other bulkheads - as a matter of fact, the pieces were so flimsy I shot off a post to the Canard Aviaition Forum to see if I had the right foam.
Labels:
Chapter 4 - Bulkheads
Tuesday, August 16, 2011
Panel Glueup
I noticed right off that my cuts hadn't been nearly as straight as I had originally thought. I had a hard time getting the strapping tape to stick to the underside of the foam when using the hinge method. I probably should have pinned the panels down when they started moving around on me as I was trying to tape them up. When one side lined up, the other side would have a gap. I did the F-22 panel first and decided to let it dry overnight before I started in on the IP. Even with the hinge method, the glue joint looked pretty sloppy to me, with some big gaps. Maybe I'm just being too picky. Before I started in on the IP, I spent some quality time sanding some of the edges straighter. It seemed to come out a little better.
Labels:
Chapter 4 - Bulkheads
Saturday, August 13, 2011
Seatback back: Another learning experience
Those of you familiar with Marc Zeitlin's page know about his "oaf stories". I may set a record for them for this chapter.
After making all the corrections in the plans, I was eager to get back to building. Steve had offered to come out and coach me when I started glassing the bulkheads, but after we got some rain (rare these days in Houston), it finally cooled down enough for me to work in the garage, and I got the bug to start right away. I had cut the glass the day before in an effort to do something to move forward, and I didn't want the cloth laying around too long gathering dust.
After spending hours rewriting the plans into a step by step checklist, I got so pumped up that I jumped right into glassing the back without doing more than glancing at them. Bad idea.
After the mess I had made from epoxy dripping around edges while doing the front side of the seatback, I decided to mask off the front side with duct tape before glassing the back. I put the seatback up on blocks to allow the glass to drape over the edges.
When I walked over to the epoxy cabinet, I was baffled as to why the light bulb inside wouldn't come on, until I realized that with temperatures in the 100s that day, the thermostat wouldn't be kicking on until it cooled down outside a lot more.
Building a metal aircraft like an RV has the advantage of allowing you to put down your tools almost anytime and coming back a few days later to finish up. With a composite plane, once you start a layup, you're committed. Laying up the back of seatback involves mixing up epoxy, micro, dry micro, and flox, so you have all sorts ways to screw things up if you're not careful.
I mixed up the micro to cover the seatback a little stiffer than the last time. It went on easily enough, although getting it around the big pores in the curved edges was messy. I mixed up some dry micro to fill in the gouges as well. I mixed up my first batch of flox using MGS. I was having a heck of a time getting the flox into the flox corners with the mixing stick before I remembered the builder's hint of using a baggie to squeeze it out. I ran inside the house and asked my wife to grab one for me since I still had my sticky gloves on. I scooped the flox into the bag, cut the corner, and marveled at how easy it was to squirt the flox into the crevices...until the baggie broke open before I was halfway down one side of the seatback. I was wondering where I could find a stronger bag when I remembered that I had bought a whole box of cake icing bags from Spruce with the first order. I found the bags, cut the hole in the tip, and the rest was fairly easy. The cake icing bags are a lot stronger than the baggies, so I was able to squeeze away without worrying about them busting open. I used the mixing stick to push the flox deeper into the crevices when needed, and I was able to get a pretty smooth flox surface.
While visiting Steve, I noticed that he used masking tape to anchor the edges of the cloth and keep the weave aligned before cutting it. I had thought this was a little excessive, but I think I'll be doing it from now on, since getting the plies to run straight is tedious at best especially after laying them down on some wet micro. Pulling on the edges of the cloth to straighten it out does work, but finding the opposite side of the thread is not so easy. I ended up pulling the cloth out of shape before I found the right thread to pull on. It took two plies of BID to cover the seatback since the roll isn't wide enough to cover it with a single ply. I was pretty pleased with how straight the second layup was until I noticed that the overlap between the two plies was one inch in one corner, but three inches in the other corner. After pulling it up again, I was able to get it a little more even (I thought).
Getting epoxy on the rounded edges without most of it running down the sides was getting me exasperated until I finally gave up on using the squeegee and just used my fingers to spread the epoxy around (still wearing gloves, of course). I scissor trimmed the excess, then started cleaning up. Whew - all done!
As I was walking out, though, I gave the layup a quick look and was surprised to several air bubbles and dry spots - I had forgotten to do the final inspection before putting everything away! I donned another pair of gloves, grabbed a work light, and went to work getting rid of the bubbles. The squeegee wasn't working too well since the layup was starting to set, so I simply flattened the bubbles by pressing my fingers against them. I don;t know if it's the epoxy, the foam, or me, but the glass did not seem to want to make full contact with the foam everywhere.
After that little faux pas, I thought I might want to peek at the checklist again. Peel ply? Oops. Luckily, I had cut it to size ahead of time before setting it aside and then forgetting about it. After mixing up another batch of epoxy, I applied the peel ply around the edges and over the overlap between the two plies. I then laid wax paper over the layup and put some weights on top, making sure they were placed over the wooden blocks the seatback was propped up on.
I was hoping to get some photos during the layup, but after my camera gave me a "Insert SD card" message, I realized that my SD card was somewhere in the house and I wasn't going to have time to go look for it.
After church the next morning, I came home and went straight to the garage to inspect the seatback and trim the excess. The MultiMax does a great job of trimming the wetted out glass, but doesn't cut well on the unwetted fiberglass at all, so I had to switch to the sanding attachment to trim that off. I used the long sanding bar to get the sides even.
I wasn't too disappointed in the result, but there were some areas I wasn't too proud of. It didn't look that bad until I took it out of the shop an into the sunlight. Yikes! I had what looked to be a big dry patch where the two plies had overlapped, and some parts of the layup had separated from the foam as well. I'm going to have to get another trouble light - I didn't see that at all with the light I have. One advantage the Aeropoxy had over MGS was that with its brown color, it was easier to see the spots that needed more epoxy. With the MGS being so clear, it's hard to tell where its making contact and where its not.
I also found a few spots around the corners where the epoxy didn't quite make contact. I probably should have held off on the side cutouts until the layups were finished. Another lesson.

I carefully marked the center cutouts and double checked which angle to cut them at before cutting them out with the Multi Max. I think I probably should have peel plied around this area as well, since it's going to get joined to something later.
After making all the corrections in the plans, I was eager to get back to building. Steve had offered to come out and coach me when I started glassing the bulkheads, but after we got some rain (rare these days in Houston), it finally cooled down enough for me to work in the garage, and I got the bug to start right away. I had cut the glass the day before in an effort to do something to move forward, and I didn't want the cloth laying around too long gathering dust.
After spending hours rewriting the plans into a step by step checklist, I got so pumped up that I jumped right into glassing the back without doing more than glancing at them. Bad idea.
After the mess I had made from epoxy dripping around edges while doing the front side of the seatback, I decided to mask off the front side with duct tape before glassing the back. I put the seatback up on blocks to allow the glass to drape over the edges.
When I walked over to the epoxy cabinet, I was baffled as to why the light bulb inside wouldn't come on, until I realized that with temperatures in the 100s that day, the thermostat wouldn't be kicking on until it cooled down outside a lot more.
Building a metal aircraft like an RV has the advantage of allowing you to put down your tools almost anytime and coming back a few days later to finish up. With a composite plane, once you start a layup, you're committed. Laying up the back of seatback involves mixing up epoxy, micro, dry micro, and flox, so you have all sorts ways to screw things up if you're not careful.
I mixed up the micro to cover the seatback a little stiffer than the last time. It went on easily enough, although getting it around the big pores in the curved edges was messy. I mixed up some dry micro to fill in the gouges as well. I mixed up my first batch of flox using MGS. I was having a heck of a time getting the flox into the flox corners with the mixing stick before I remembered the builder's hint of using a baggie to squeeze it out. I ran inside the house and asked my wife to grab one for me since I still had my sticky gloves on. I scooped the flox into the bag, cut the corner, and marveled at how easy it was to squirt the flox into the crevices...until the baggie broke open before I was halfway down one side of the seatback. I was wondering where I could find a stronger bag when I remembered that I had bought a whole box of cake icing bags from Spruce with the first order. I found the bags, cut the hole in the tip, and the rest was fairly easy. The cake icing bags are a lot stronger than the baggies, so I was able to squeeze away without worrying about them busting open. I used the mixing stick to push the flox deeper into the crevices when needed, and I was able to get a pretty smooth flox surface.
While visiting Steve, I noticed that he used masking tape to anchor the edges of the cloth and keep the weave aligned before cutting it. I had thought this was a little excessive, but I think I'll be doing it from now on, since getting the plies to run straight is tedious at best especially after laying them down on some wet micro. Pulling on the edges of the cloth to straighten it out does work, but finding the opposite side of the thread is not so easy. I ended up pulling the cloth out of shape before I found the right thread to pull on. It took two plies of BID to cover the seatback since the roll isn't wide enough to cover it with a single ply. I was pretty pleased with how straight the second layup was until I noticed that the overlap between the two plies was one inch in one corner, but three inches in the other corner. After pulling it up again, I was able to get it a little more even (I thought).
Getting epoxy on the rounded edges without most of it running down the sides was getting me exasperated until I finally gave up on using the squeegee and just used my fingers to spread the epoxy around (still wearing gloves, of course). I scissor trimmed the excess, then started cleaning up. Whew - all done!
As I was walking out, though, I gave the layup a quick look and was surprised to several air bubbles and dry spots - I had forgotten to do the final inspection before putting everything away! I donned another pair of gloves, grabbed a work light, and went to work getting rid of the bubbles. The squeegee wasn't working too well since the layup was starting to set, so I simply flattened the bubbles by pressing my fingers against them. I don;t know if it's the epoxy, the foam, or me, but the glass did not seem to want to make full contact with the foam everywhere.
After that little faux pas, I thought I might want to peek at the checklist again. Peel ply? Oops. Luckily, I had cut it to size ahead of time before setting it aside and then forgetting about it. After mixing up another batch of epoxy, I applied the peel ply around the edges and over the overlap between the two plies. I then laid wax paper over the layup and put some weights on top, making sure they were placed over the wooden blocks the seatback was propped up on.
I was hoping to get some photos during the layup, but after my camera gave me a "Insert SD card" message, I realized that my SD card was somewhere in the house and I wasn't going to have time to go look for it.
I also found a few spots around the corners where the epoxy didn't quite make contact. I probably should have held off on the side cutouts until the layups were finished. Another lesson.
Labels:
Chapter 4 - Bulkheads
Wednesday, June 29, 2011
My dog ate my plans!
Tried to, anyway. This guy is seven years old but seems to he going through a new puppy phase. I had brought the plans back into the house to finish making all the corrections on them, but my desk was already cluttered, so I laid them on the floor until I could get around to them. I was driving home the next day when my wife called to tell me she had found Buck at the top of the stairs, surrounded by shreds of paper. He had chewed most of the corner from Section I, but the worst damage was to the notebook of photos Steve had loaned me. I usually take pride in treating items loaned to me with great care, so I was especially upset about that. I was able to find a replacement notebook at Office Depot, but the photos are still chewed up a bit. (Really sorry about that, Steve!)
Labels:
Chapter 4 - Bulkheads
Saturday, June 18, 2011
Seatback continued
Today I did all the angled cutouts on the seatback, rounded the sides, and cut the flox corners. I used the CAD files rather than the plans to mark the cutouts. I used a Shureform tool to cut the bottom angle, and a hacksaw, Dremel, utility knife and Dremel Multi-Max oscillating tool for the cutouts and flox corners. After reading a few other builder websites, it looks like cutting the bottom angle wasn't so easy for a lot of folks, but I was able to adjust as I went along with the Shureform, so it was pretty quick and simple. I also chiseled out the areas that had gotten epoxy in them when I was laying up the front side. I'll put some dry micro in there when I'm ready to glass it.
Labels:
Chapter 4 - Bulkheads
Thursday, June 16, 2011
First layup and first big learning experience
That's how I'm going look at these activities, rather than calling them "disasters". A lot of the homebuilding experience outcome will depend on my attitude and perspective, and learning to deal with issues is one of the benefits of building my own airplane.
I had a lot of trepidation about starting my first layup on the actual aircraft rather than a practice piece. After doing a layup on the old practice kit airfoil, I realized I had forgotten a few things from the last time I had performed a layup, and had a lot more questions. I decided to back off for a few days and spent some more time updating the detailed directions that I was writing, re-watching the Ruran video, and checking some of the forums, archives, and FAQs. I was still a little nervous about going ahead with the layup, but in the end realized that I had an extra piece of seatback foam anyway (for some reason, they recommend you order two of them, even though one piece is enough), so if I screwed this one up, I could just build another one.
There was some question on just how stiff to make the micro that was first going to be applied to the seatback. The general directions and the video talk about using micro slurry, but Chapter 4 says to mix this batch thick enough so it just runs, which sounds more like wet micro than micro slurry. Chapter 3 also mentioned that wet micro should be used instead of slurry for urethane foam, but doesn't mention using it for PVC. Both PVC and urethane have large open pores, which might be the reason for wet micro instead of slurry. I decided on wet micro.
I was using a coffee creamer container to pour the micro ballons into the epoxy. I thought that pouring micro from a bottle would be much less messy that scooping it from an open bag. I used up most of the bottle just covering seatback front, though, so I'll need to find some bigger bottles for the next layup.
I had cut the UNI and laid it on the seatback to make sure it would fit before doing the actual layup. Trying to figure out which way to lay the weave got confusing for some reason. I had cut one piece pretty short, and it just barely covered the seatback, but I figured it would be okay when I did the layup.
The epoxy pump setup did not work as well as I'd hoped. I had to tilt the mixing cup to get it to fit under the resin pump, and the nozzle for the slow hardener pump squirted the hardener straight out to the side, rather than down, missing the cup entirely and leaving a mess all over the scale. I used more of the slow hardener than the fast - the fast comes out like syrup, the slow stuff like water. Once I figured out how to press down gently enough on the punp to get most of the hardener in the cup, it went a lot smoother, and it was fairly easy to tweak the amount of hardener to get the correct ratio. I found another set of pumps at a marine supply store here, and will be replacing that pump nozzle soon. I also forgot to weigh the resin before squirting in the hardener once, and had to set that cup aside for it to harden on its own.
I wasn't worried about my scale only being accurate to within 1 gram rather than 0.1 grams, but it started getting flaky on me after a few mixes, jumping from one value to another. I suspect it may have had something to do with all the resin and hardener I had spilled on it running down the sides, but I'll have to double check it later.
I had bought some 4mil plastic and butcher paper to protect the workbench. I used the butcher paper for this layup, and hung the tapered end of the seatback over the edge of the workbench as shown in the plans. The epoxy from the overhanging edge dripped all over the garage floor, and I ended up spreading the mess by tramping in it as well. (I'll be covering the floor with butcher paper for the next layup.)
The directions were adamant about not getting micro between the layers of cloth, but I noticed that the epoxy I was squeegeeing off the layup was turning white, and realized that it was somehow pulling up the micro from the layer below. I didn't know what to do except squeegee off as much as I could. I could see patches of white mixed with clear areas through the glass, and I couldn't tell if the clear areas were dry spots or epoxy, since MGS is so clear. Using my LED trouble light was problematic - I had to hold it at just the right angle to inspect the layup - it was either too dim or too bright at other angles.
I got epoxy all over the squeegee when I laid it down on top of the layup, all over the scissors I was using to cut the glass, and all over the hair dryer and trouble light as well. I had put on the shop apron before the layup, and was glad I did when I leaned over the workpiece and got epoxy all over the front of the apron. The seatback kept shifting around as I was pulling the glass on it, making even more of a mess. I was lucky that I didn't try to adjust my glasses, and I'll just be wearing safety glasses the next time around. I was very careful when wiping the sweat out of my eyes, and will wear a sweatband the next time as well. I cleaned up the tools as best I could when I was finished.
I laid a sheet of wax paper over the layup and set some boards over the wax paper with weights on top of that to keep it from warping while curing.
I had planned on this job taking about half an hour, but I think I spent more like two hours with all the SNAFUs. I went back after a couple of hours to see if I could knife trim the edges, but I hadn't laid the edges of the peel ply straight along the edge of the workpiece, and didn't want to risk disturbing the fibers by trying to cut through both the glass and the peel ply.
I went out the next morning to look at the job. The wax paper had left some smooth areas where the eopxy had oozed up, and the boards had been close enough to the edges of the wax papaer to pick up some epoxy and adhere themselves to the workpiece. When I tried to lift the seatback from the table, I pulled up several pieces of butcher block paper with it - since I hadn't masked off the sides of the workpieces, the epoxy had dripped down the edges and under the workpiece. I think a lot of this will get trimmed off anyway on the next step, and I guess I'll just patch the rest with dry micro. I pulled off the peel ply and found a spot where the peel ply had curled up a bit. When I pulled the peel ply off, the curled epoxy stayed behind. I'll have to sand that off later.

I also poked my fingers in a few places moving seatback around - the loose fibers really are as sharp as needles.
I had a lot of trepidation about starting my first layup on the actual aircraft rather than a practice piece. After doing a layup on the old practice kit airfoil, I realized I had forgotten a few things from the last time I had performed a layup, and had a lot more questions. I decided to back off for a few days and spent some more time updating the detailed directions that I was writing, re-watching the Ruran video, and checking some of the forums, archives, and FAQs. I was still a little nervous about going ahead with the layup, but in the end realized that I had an extra piece of seatback foam anyway (for some reason, they recommend you order two of them, even though one piece is enough), so if I screwed this one up, I could just build another one.
There was some question on just how stiff to make the micro that was first going to be applied to the seatback. The general directions and the video talk about using micro slurry, but Chapter 4 says to mix this batch thick enough so it just runs, which sounds more like wet micro than micro slurry. Chapter 3 also mentioned that wet micro should be used instead of slurry for urethane foam, but doesn't mention using it for PVC. Both PVC and urethane have large open pores, which might be the reason for wet micro instead of slurry. I decided on wet micro.
I was using a coffee creamer container to pour the micro ballons into the epoxy. I thought that pouring micro from a bottle would be much less messy that scooping it from an open bag. I used up most of the bottle just covering seatback front, though, so I'll need to find some bigger bottles for the next layup.
I had cut the UNI and laid it on the seatback to make sure it would fit before doing the actual layup. Trying to figure out which way to lay the weave got confusing for some reason. I had cut one piece pretty short, and it just barely covered the seatback, but I figured it would be okay when I did the layup.

I wasn't worried about my scale only being accurate to within 1 gram rather than 0.1 grams, but it started getting flaky on me after a few mixes, jumping from one value to another. I suspect it may have had something to do with all the resin and hardener I had spilled on it running down the sides, but I'll have to double check it later.
Spreading the micro went fairly easy, although some ended up dripping over the edge of the seatback. After spreading the first batch, I wasn't sure if I could use the same cup to mix the next batch of epoxy or not. I went ahead and did it anyway.
Laying the glass was a nightmare. I had folded the glass and set it aside earlier, but when I tried to lay it over the wet micro, I couldn't figure out how I had laid it out the first time. It always seemed to end up a couple of inches short no matter which way I laid it. I finally ended up cutting it up and using smaller pieces. When I went to the cutting board to cut another piece, I ended up pullng the last foot of UNI off the roll and had to dig under the workbench for another bolt. I had taken the gloves off to keep the new bolt free from epoxy while I hung in the cabinet, and when I tried to put them back on they ended up tearing in several places.
Getting the edges of the two pieces of the UNI to line up took forever, and pulling on the fibers didn't seem to help. I had to keep pulling the piece up and trying to lay it down again to get the edges to match. The second roll of UNI didn't have as clean an edge as the first roll, so I let it overlap a bit. I was glad that I had precut the peel ply before the layup and was able to just pick them from the bench and lay them in place without having to cut pieces off a roll while wearing epoxy covered gloves. (I did have to cut an extra piece for the join between the two pieces on the second layer of the layup.)
The directions were adamant about not getting micro between the layers of cloth, but I noticed that the epoxy I was squeegeeing off the layup was turning white, and realized that it was somehow pulling up the micro from the layer below. I didn't know what to do except squeegee off as much as I could. I could see patches of white mixed with clear areas through the glass, and I couldn't tell if the clear areas were dry spots or epoxy, since MGS is so clear. Using my LED trouble light was problematic - I had to hold it at just the right angle to inspect the layup - it was either too dim or too bright at other angles.
I got epoxy all over the squeegee when I laid it down on top of the layup, all over the scissors I was using to cut the glass, and all over the hair dryer and trouble light as well. I had put on the shop apron before the layup, and was glad I did when I leaned over the workpiece and got epoxy all over the front of the apron. The seatback kept shifting around as I was pulling the glass on it, making even more of a mess. I was lucky that I didn't try to adjust my glasses, and I'll just be wearing safety glasses the next time around. I was very careful when wiping the sweat out of my eyes, and will wear a sweatband the next time as well. I cleaned up the tools as best I could when I was finished.
I laid a sheet of wax paper over the layup and set some boards over the wax paper with weights on top of that to keep it from warping while curing.
I had planned on this job taking about half an hour, but I think I spent more like two hours with all the SNAFUs. I went back after a couple of hours to see if I could knife trim the edges, but I hadn't laid the edges of the peel ply straight along the edge of the workpiece, and didn't want to risk disturbing the fibers by trying to cut through both the glass and the peel ply.
I went out the next morning to look at the job. The wax paper had left some smooth areas where the eopxy had oozed up, and the boards had been close enough to the edges of the wax papaer to pick up some epoxy and adhere themselves to the workpiece. When I tried to lift the seatback from the table, I pulled up several pieces of butcher block paper with it - since I hadn't masked off the sides of the workpieces, the epoxy had dripped down the edges and under the workpiece. I think a lot of this will get trimmed off anyway on the next step, and I guess I'll just patch the rest with dry micro. I pulled off the peel ply and found a spot where the peel ply had curled up a bit. When I pulled the peel ply off, the curled epoxy stayed behind. I'll have to sand that off later.


I also poked my fingers in a few places moving seatback around - the loose fibers really are as sharp as needles.
Labels:
Chapter 4 - Bulkheads
Monday, May 16, 2011
Chapter 4 - Bulkheads
After finishing the epoxy hot box, I got a wild hair and decided I had to start something on the actual airplane. I dug through the boxes of foam and pulled out some of the high density last-a-foam (who comes up with these names, anyway?) I cut out the drawing for the F-28 panel and went to work with a razor knife.
I am using both the original drawings and the CAD printouts from Marc Zeitlin's site. I've seen some complaints about the original hand drawn drawings not always lining up, and I figured a CAD file would be more precise. Being able to cut up the CAD drawings while leaving the originals intact was a plus as well. I noticed that the two sets don't always line up, though, and figured the hand drawings were the authority when they didn't match up.
I was worried about get the bevel on the F-22 doubler just right since it was at such a shallow angle, but my trusty wood rasp got it right on the money.
I had seem some guys complaining about how hard it was to cut this foam and thought "how hard can it be? It's foam!" Well, there's foam, and then there's foam. The heavy density last-a foam is like sandstone - it took forever to get the F-28 cut out.
Flush with my success, I proceeded to go to work on the instrument lower panel section. I had to put a 1/4" spacer down the center of the CAD printout to get it to match the hand drawings. I quickly learned a few lessons; first, don't leave your original drawings under the foam panel you are cutting out. (Yep, I sliced right through them. Gonna have to tape them back together.) Second, hole saw drill bits are great for cutting out the corners if you can keep control of the drill bit. I left a few ugly corners that I'll have to fix after I glass the panel. Third, read the directions and notes before you begin. After I finished the lower panel, I realized that I had forgotten to add the extra 1/4" to the bottom that everyone says is needed to get it to fit. Crap. But all in all, nothing was unfixable at this stage:
After cutting out the bulkheads, I made sure to label all of the pieces, and marked the seatback with "front/back/top/bottom" as well. I had read about some builders accidently making the cutouts backwards, and didn't want to make the same mistake.
Labels:
Chapter 4 - Bulkheads
Subscribe to:
Posts (Atom)